I use OVH services because of their DDoS protection which until now has mitigated threats without issues.
I wrote here about their latest VPS plans: New VPS plans from OVH
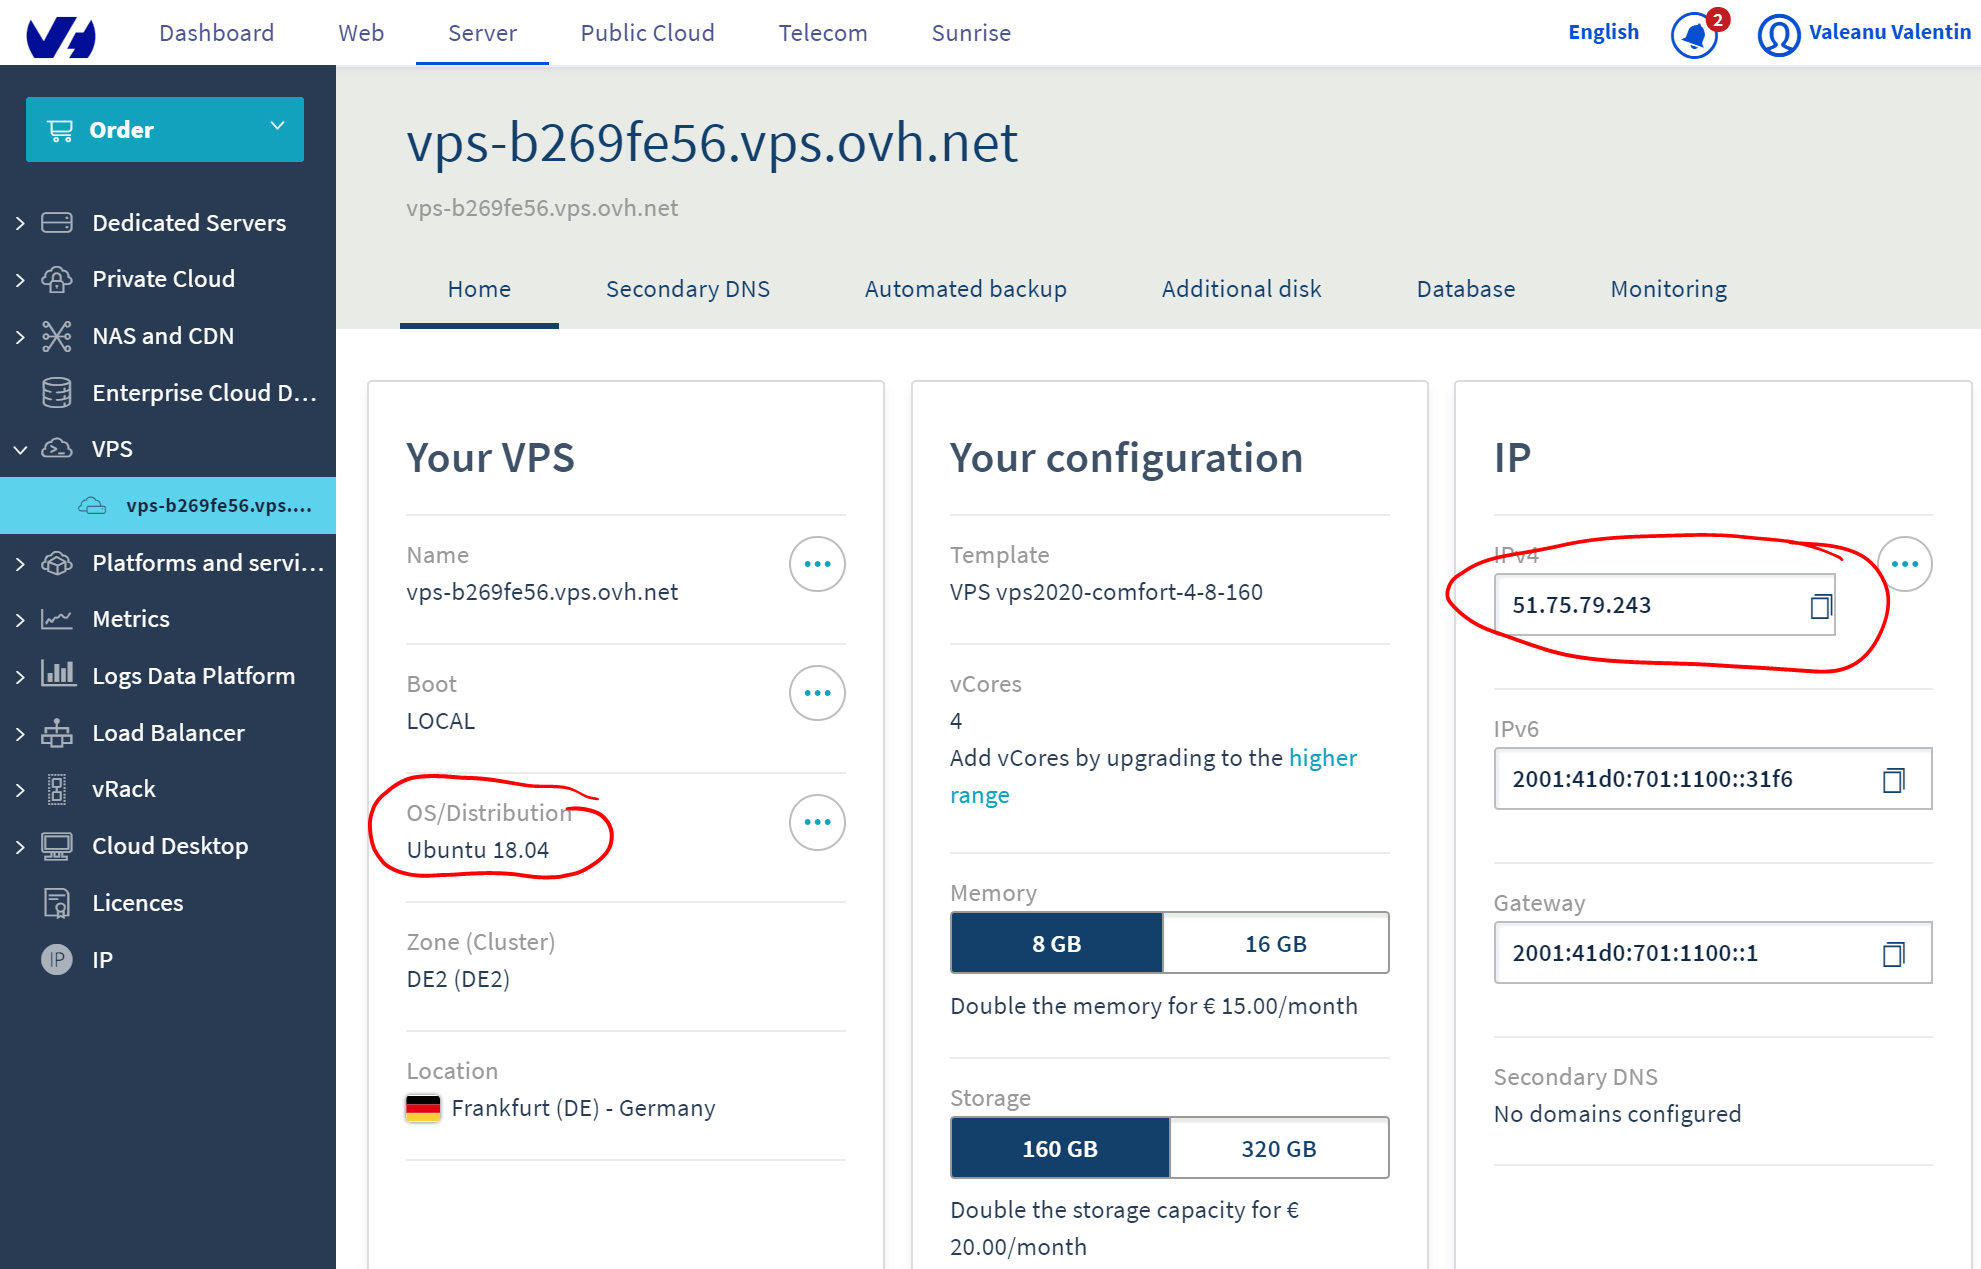
After you order the VPS you need to select the operating system. For this tutorial I'll use Ubuntu 18.04 as currently it is the latest one supported by the installer.
As soon as your VPS is ready we need the IP address and the credentials received by email
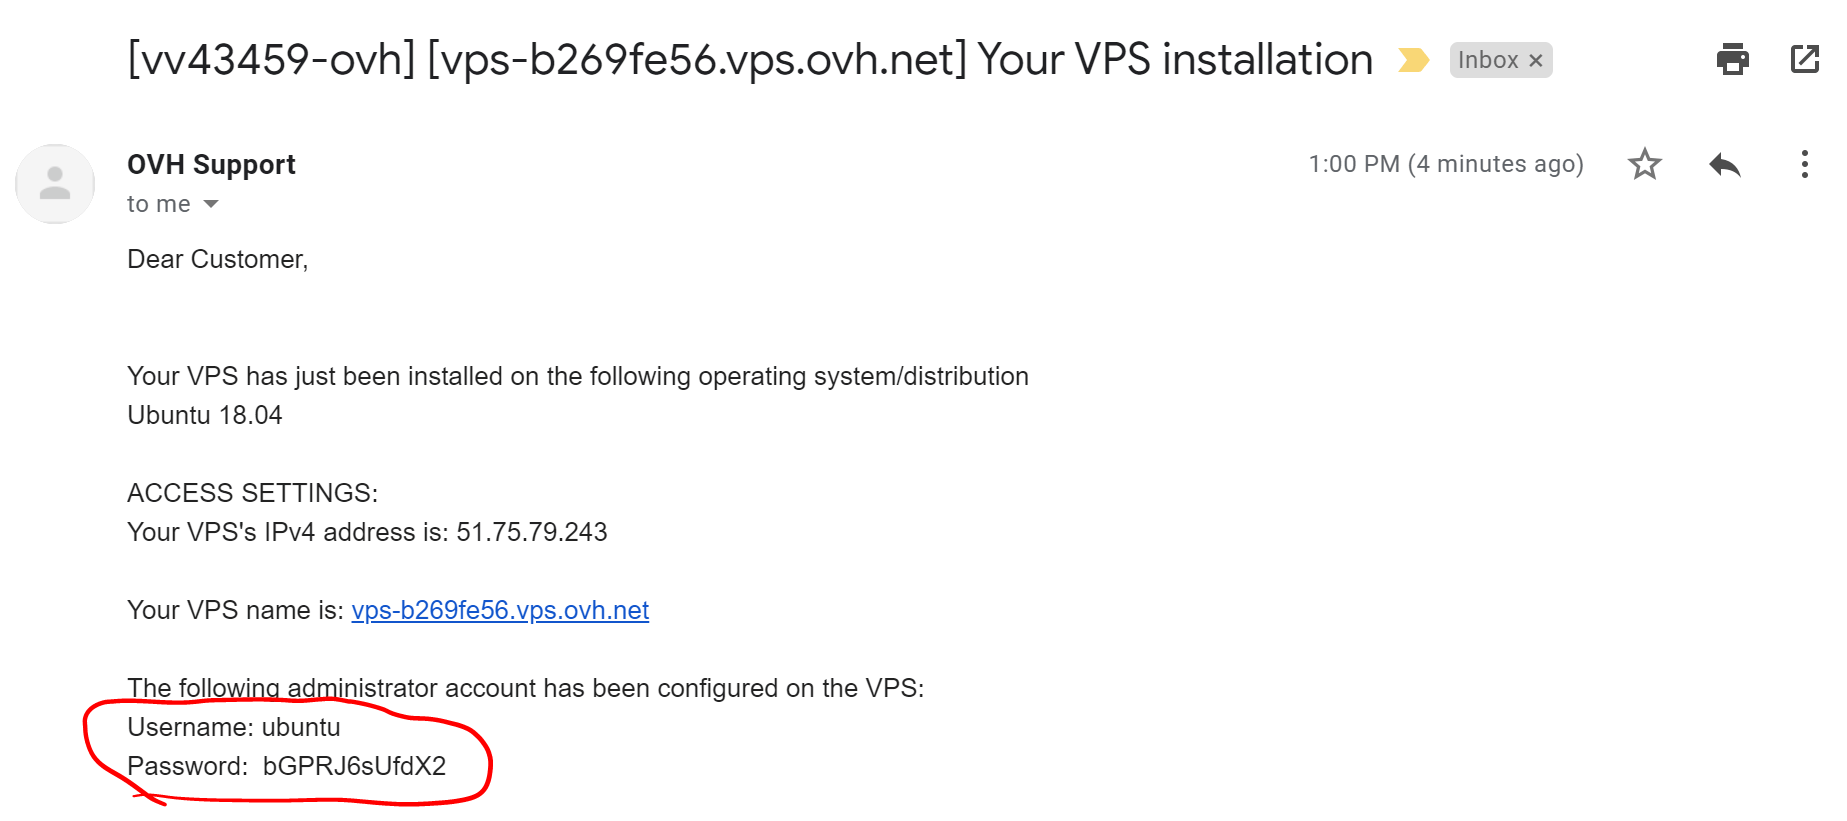
* I won't hide security information like IPs and ports as this is a disposable VPS I use for this tutorial.
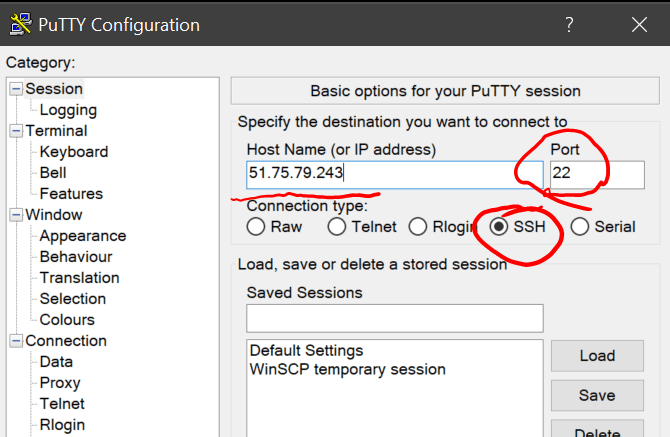
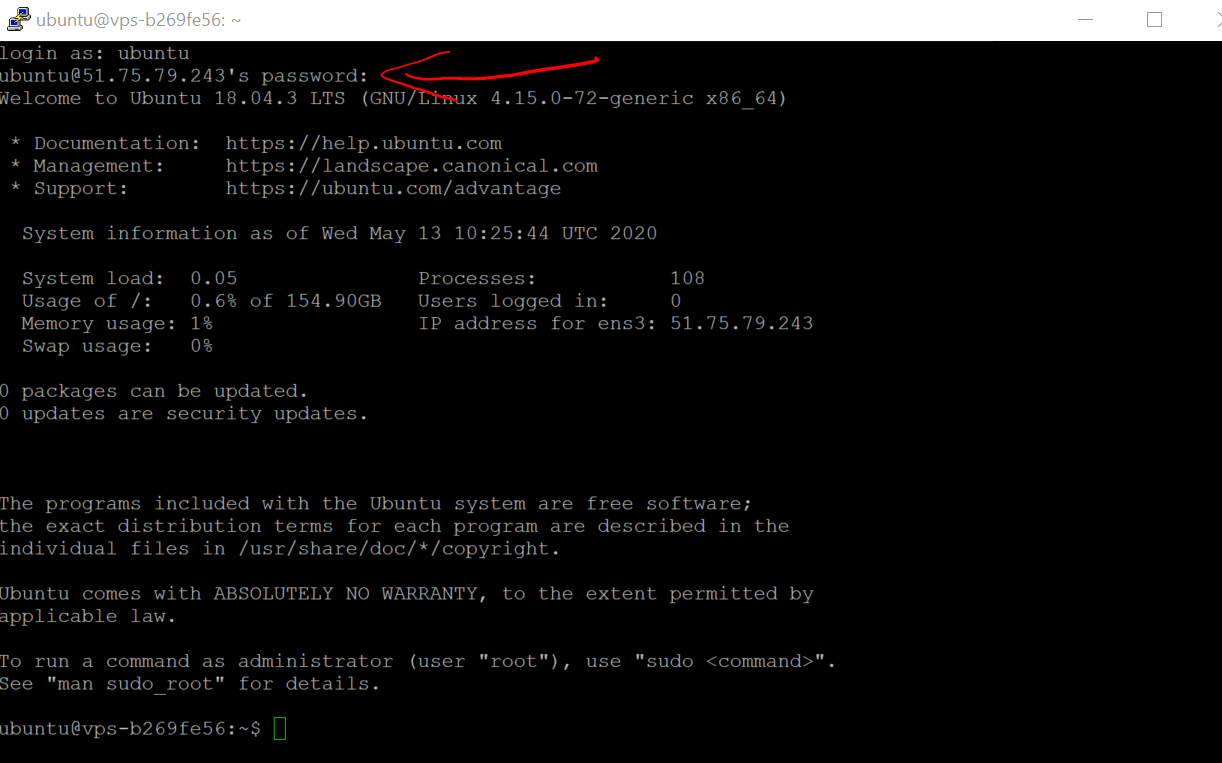
With this details we can connect using PuTTY. The default port for SSH is port 22. We'll change it later after the first login to increase the security.
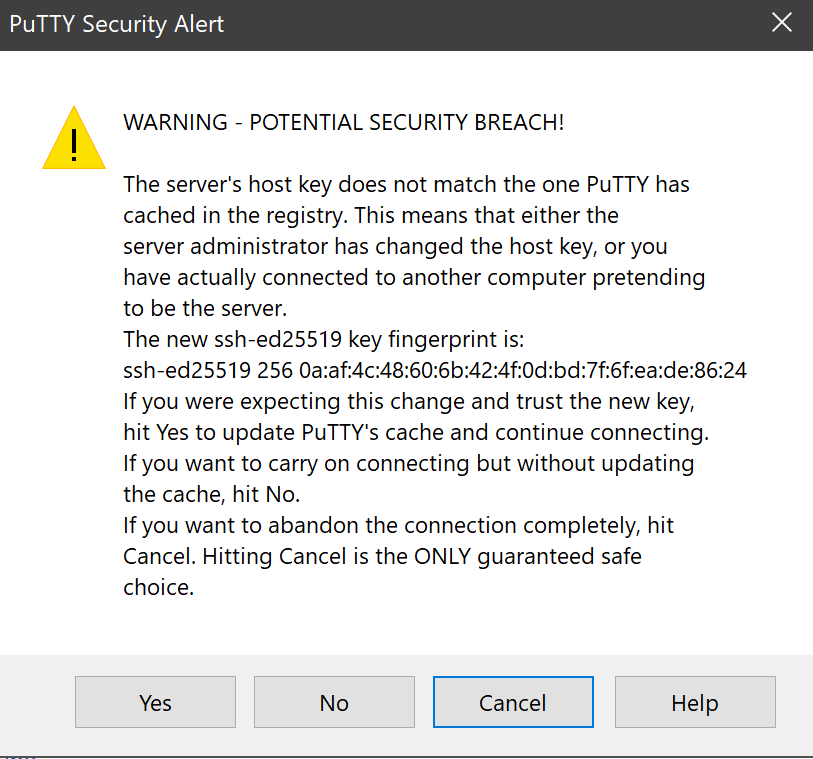
We need to accept the security warning, there's no issue actually. After that we need to login using the details provided by email. Be aware that while entering the password you won't have feedback.
Now we can change the default port for SSH using:
sudo nano /etc/ssh/sshd_configIn the first lines of the text there should be a line #Port 22. Delete the # as it defines a comment and that line is ignores. Modify the port number but keep in mind to not use an already defined port for other services. A complete list of standard ports is available here.
For this tutorial I'll go with port 2200 in a pure random method.
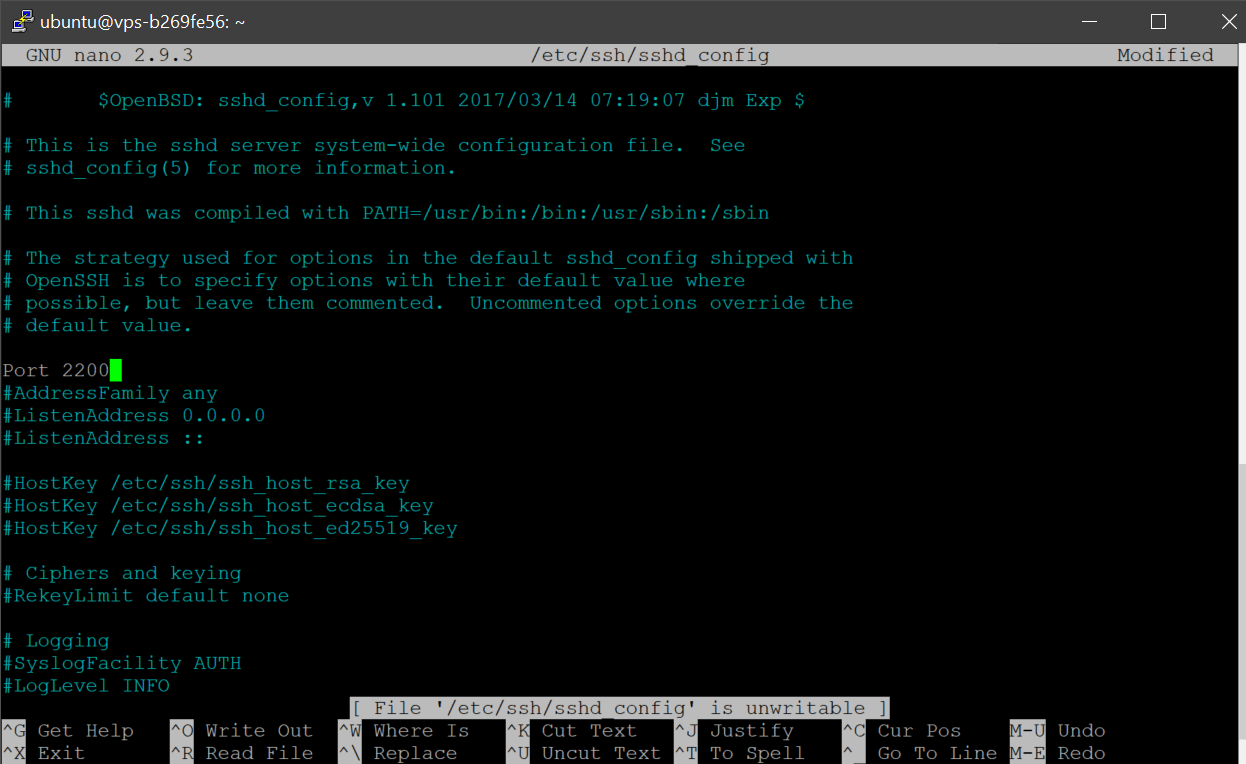
Ctrl-O then Enter to save the file. Ctrl-X to go back to the previous screen.
sudo systemctl reload sshdto update the SSH daemon settings and apply the new port. It is recommended to close this connection and start a new one using the new port.
After reconnecting we need to be sure that the hostname is in the FQDN (fully qualified domain name) format as this is a requirement for avoiding issues during Virtualmin installation.
* you can use anytime the clear command to cleanup the terminal screen.
if hostname returns only the name of the VPS without the domain.tld part we'll need to set the hostname (in this case I'm going with vps.valentinvaleanu.ro) using:
sudo hostname vps.valentinvaleanu.rocheck again using
hostname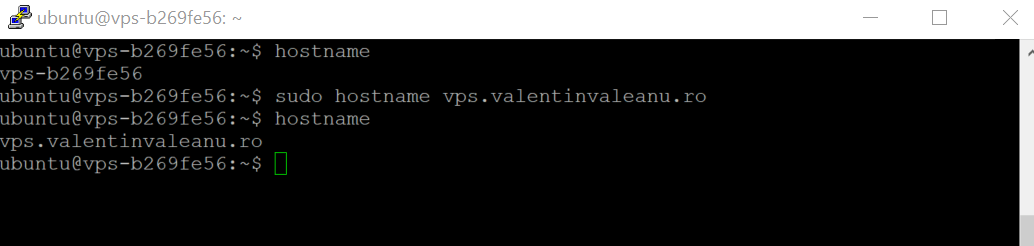
Now we are ready to run the installer script found at http://software.virtualmin.com/gpl/scripts/install.sh
Run the following command in terminal
wget http://software.virtualmin.com/gpl/scripts/install.sh

sudo /bin/sh install.sh
Press y to accept and wait to finish
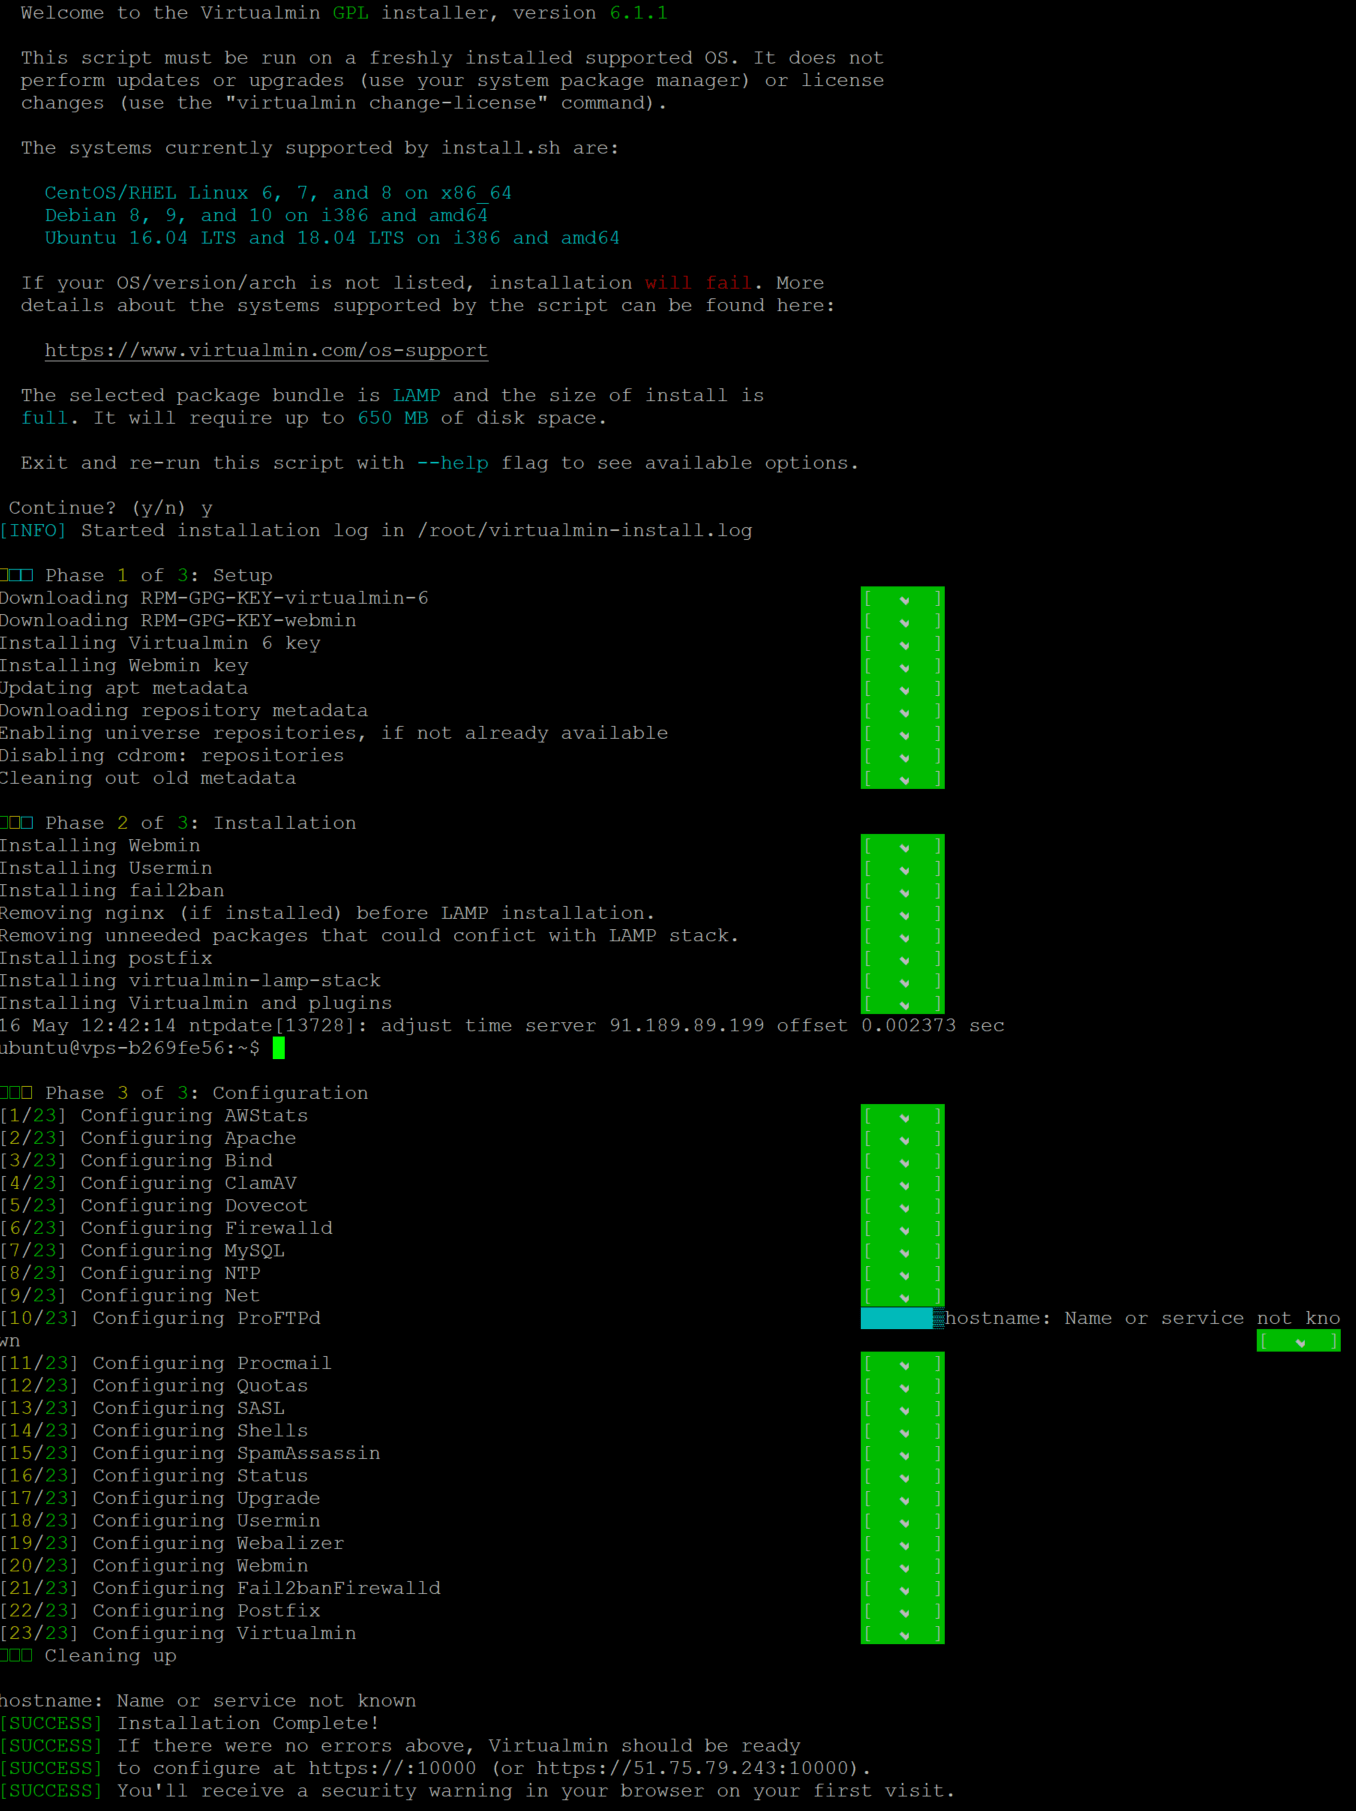
After the installation you can access Virtualmin at https://IP:1000, in this case will be https://51.75.79.243:10000
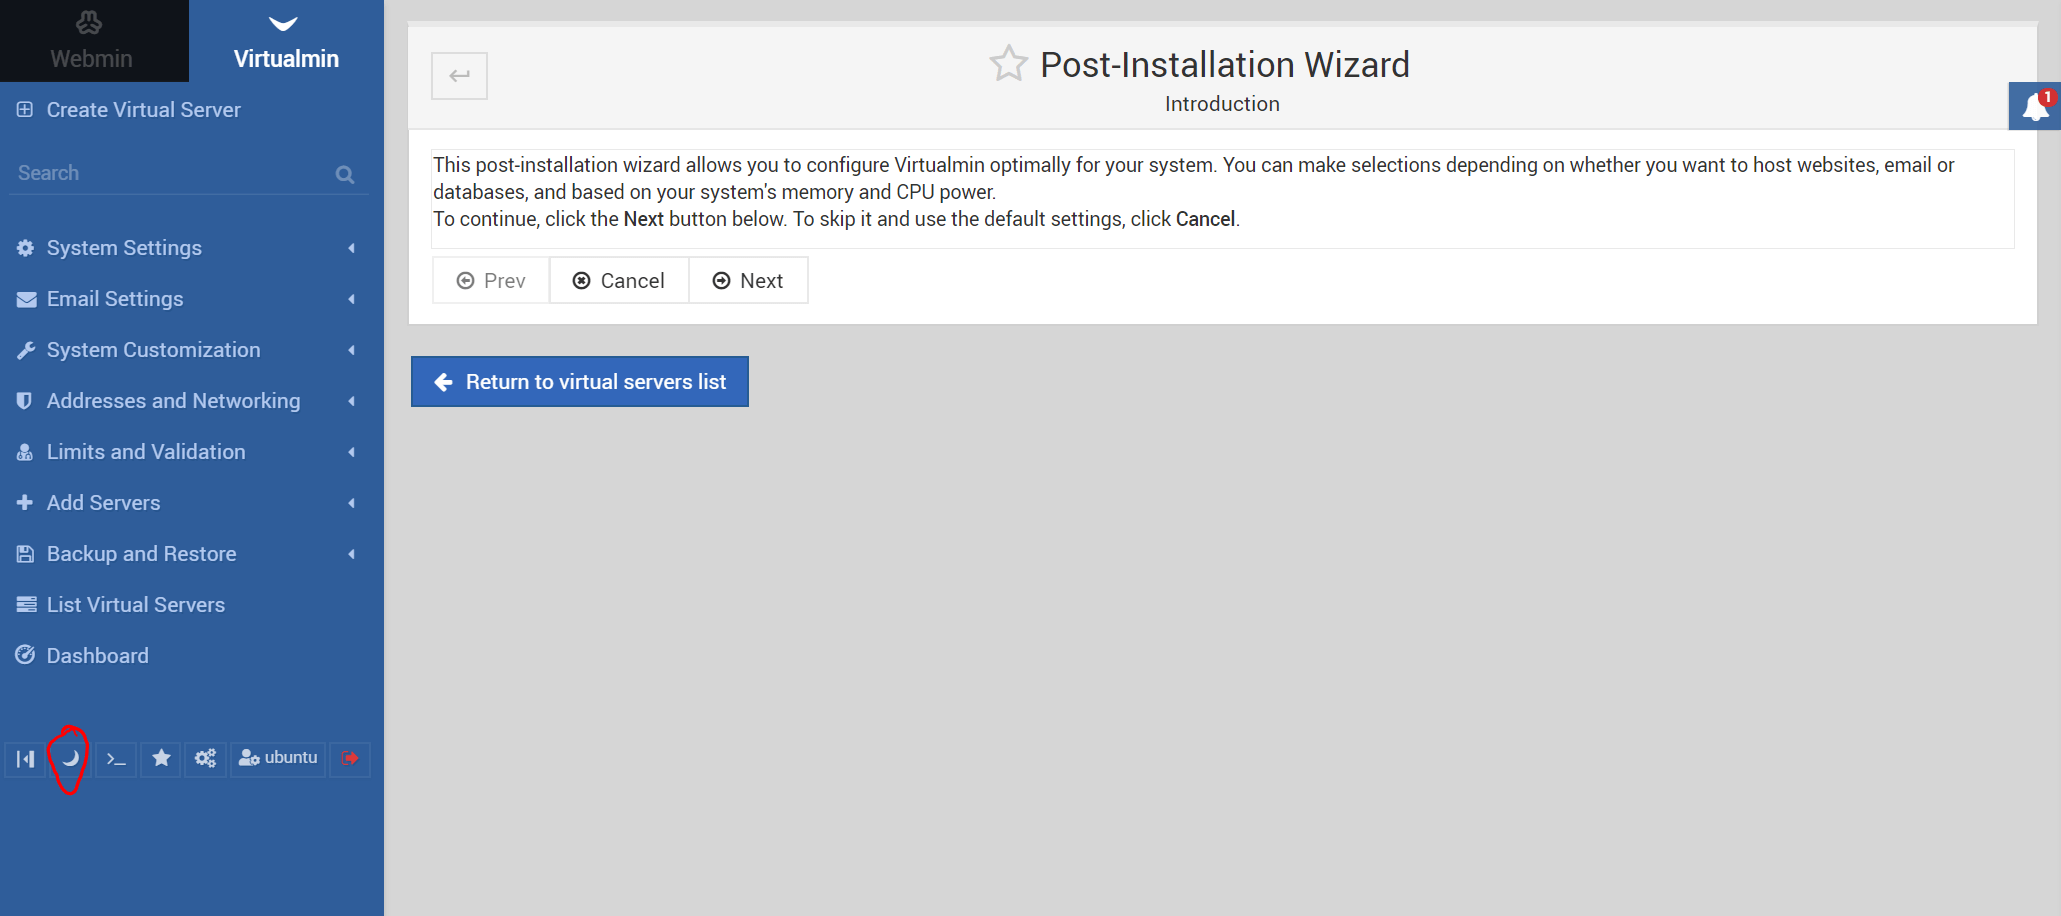
* I prefer dark interfaces so I'll change it using the left bottom button.
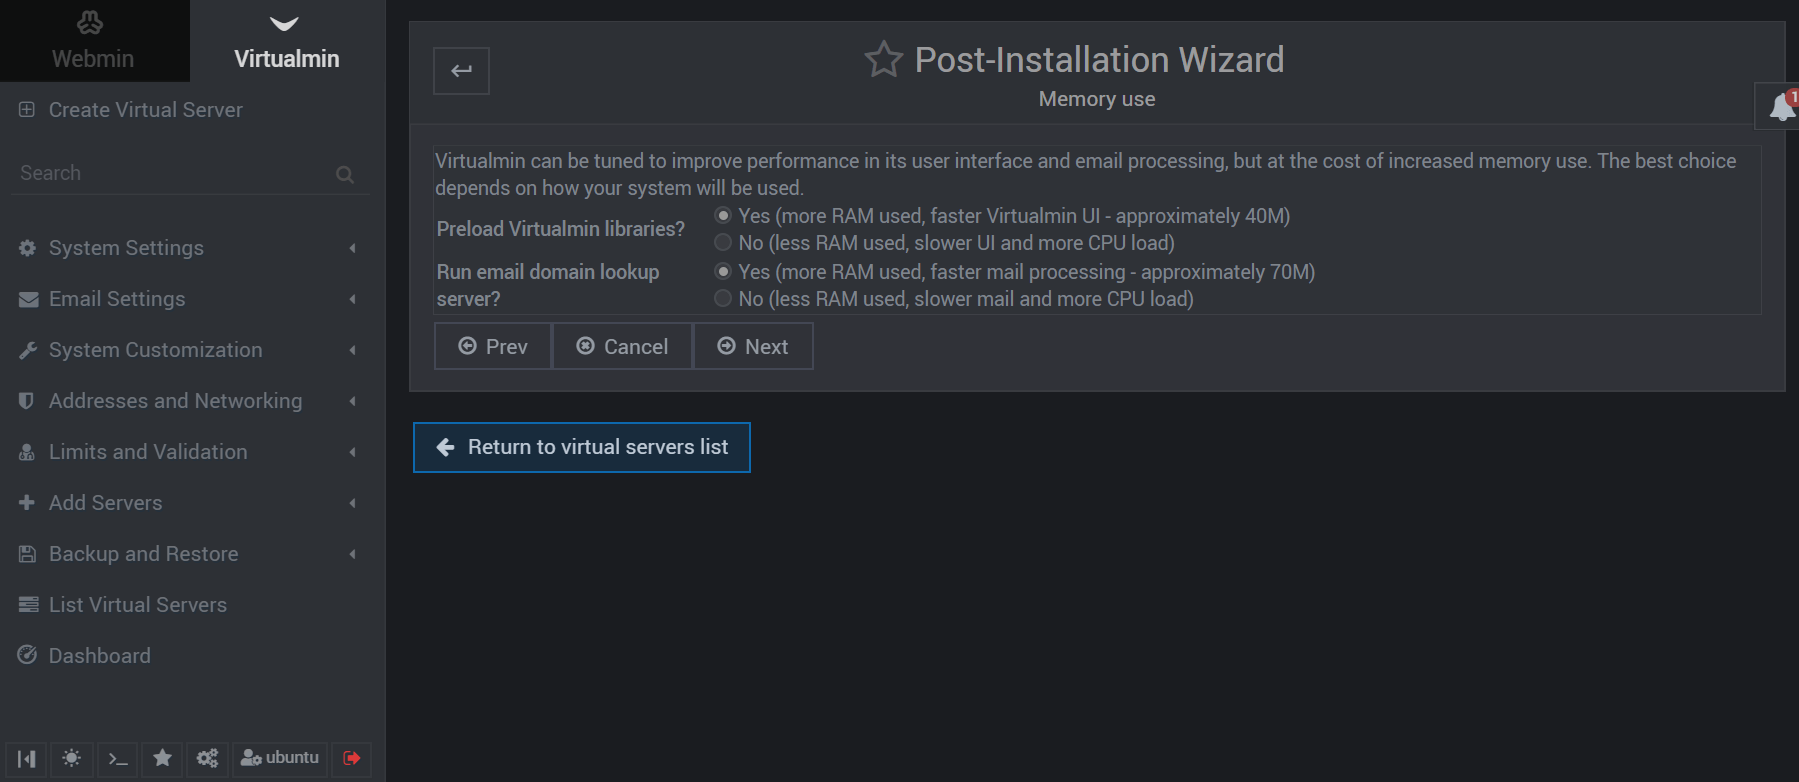
Memory use: select yes for both as the RAM impact is very low for this options
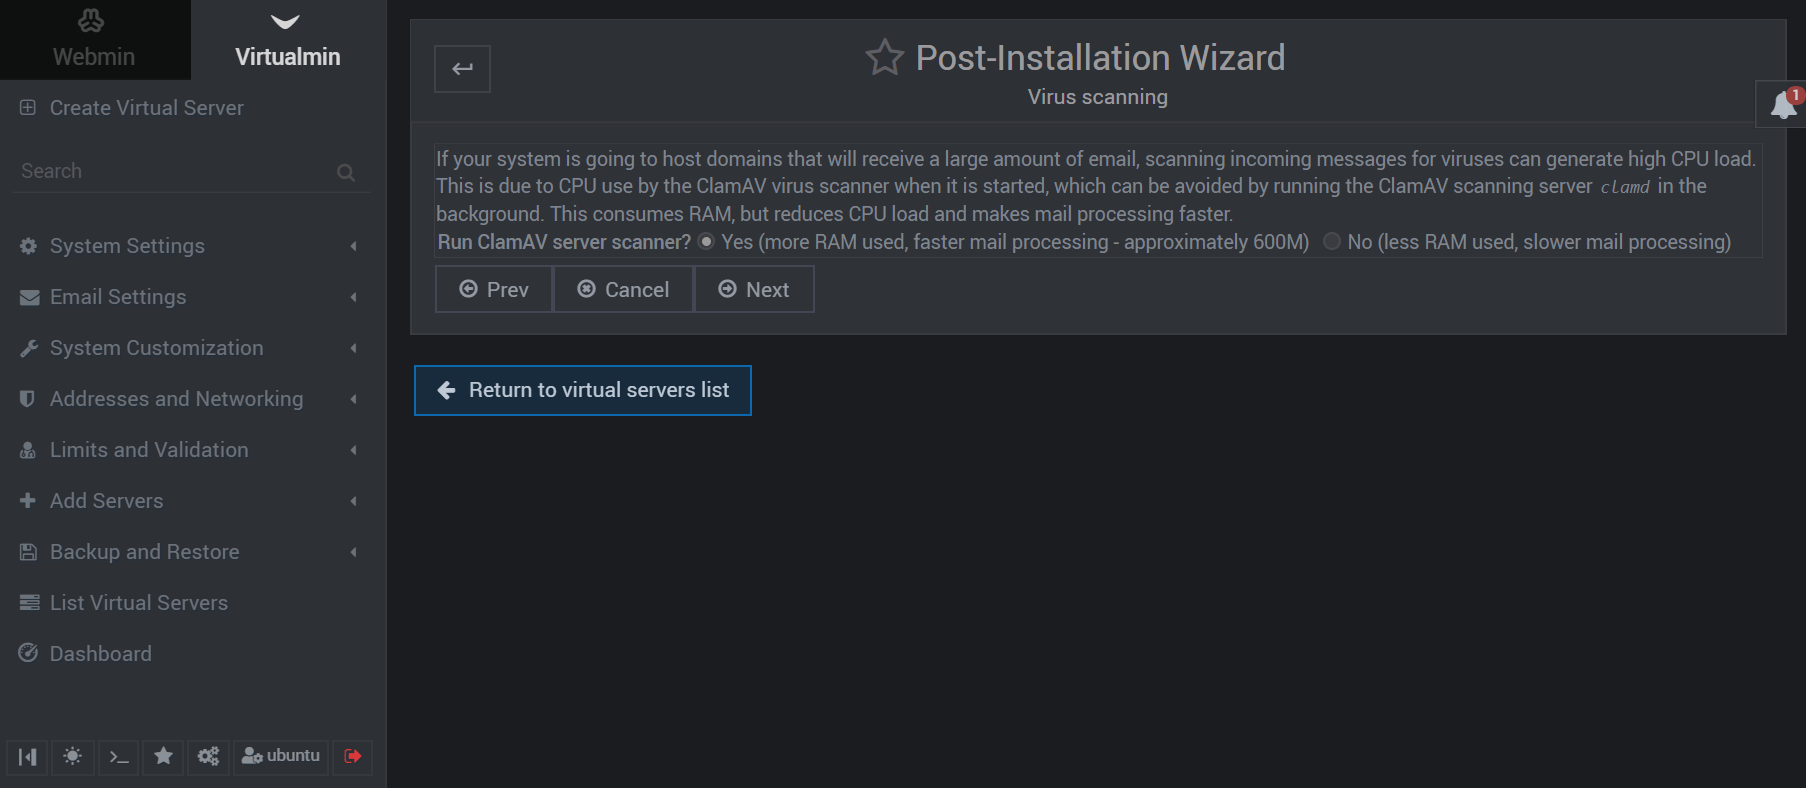
Virus scanning: ClamAV can be very resource hungry and create issues. Sometimes it goes after 900GB-1GB of RAM with huge CPU spikes. You can turn off ClamAV scanning for emails later. For this tutorial I'll let it on.
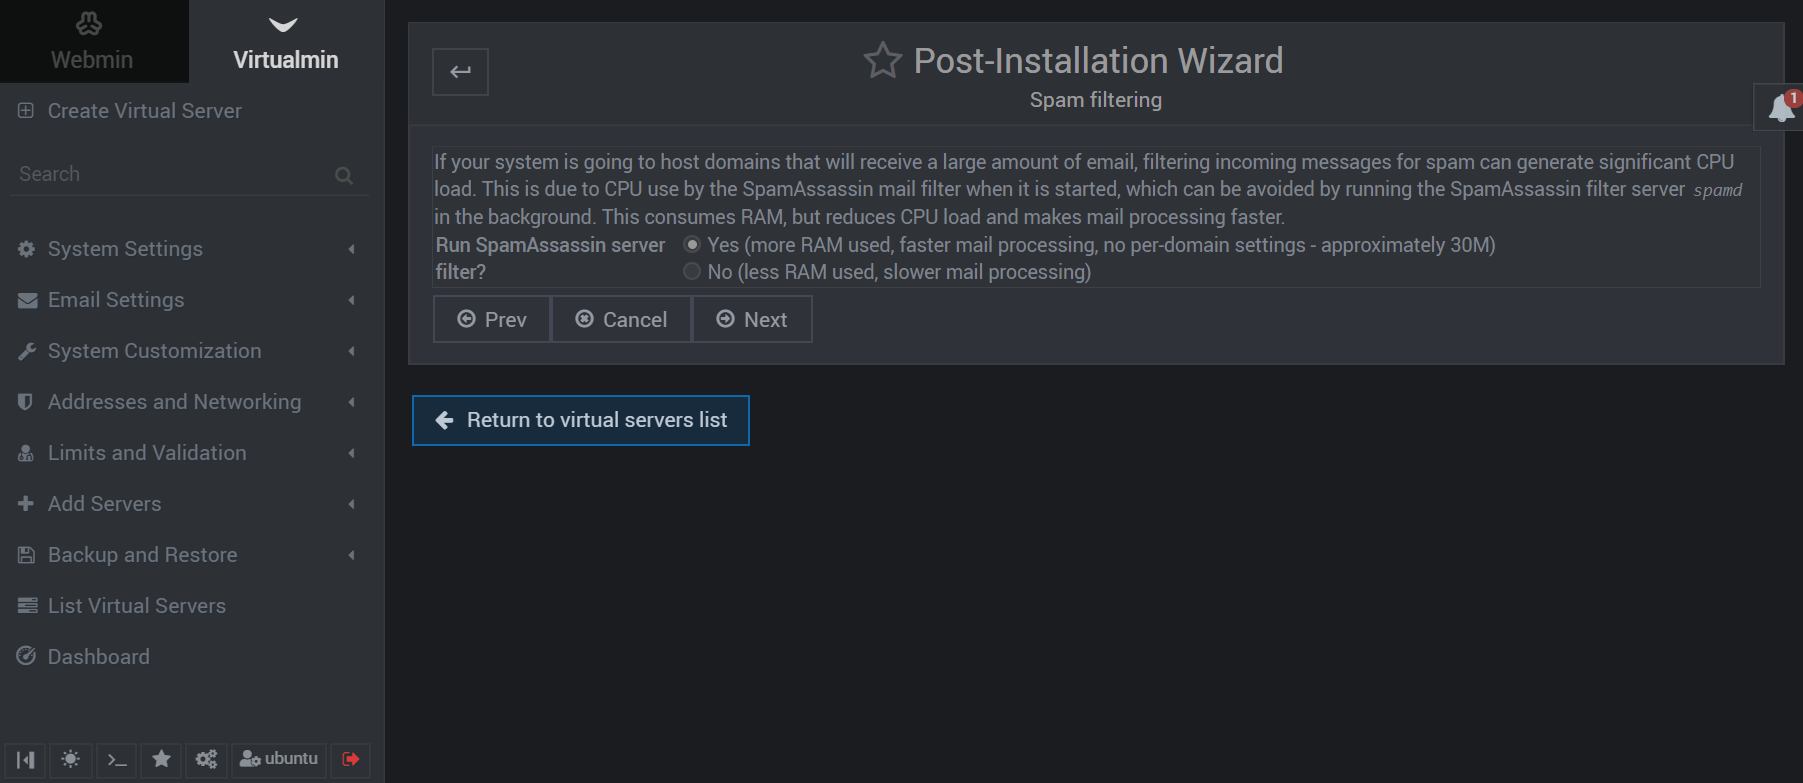
SPAM filtering: select yes. Same situation like previous ClamAV.
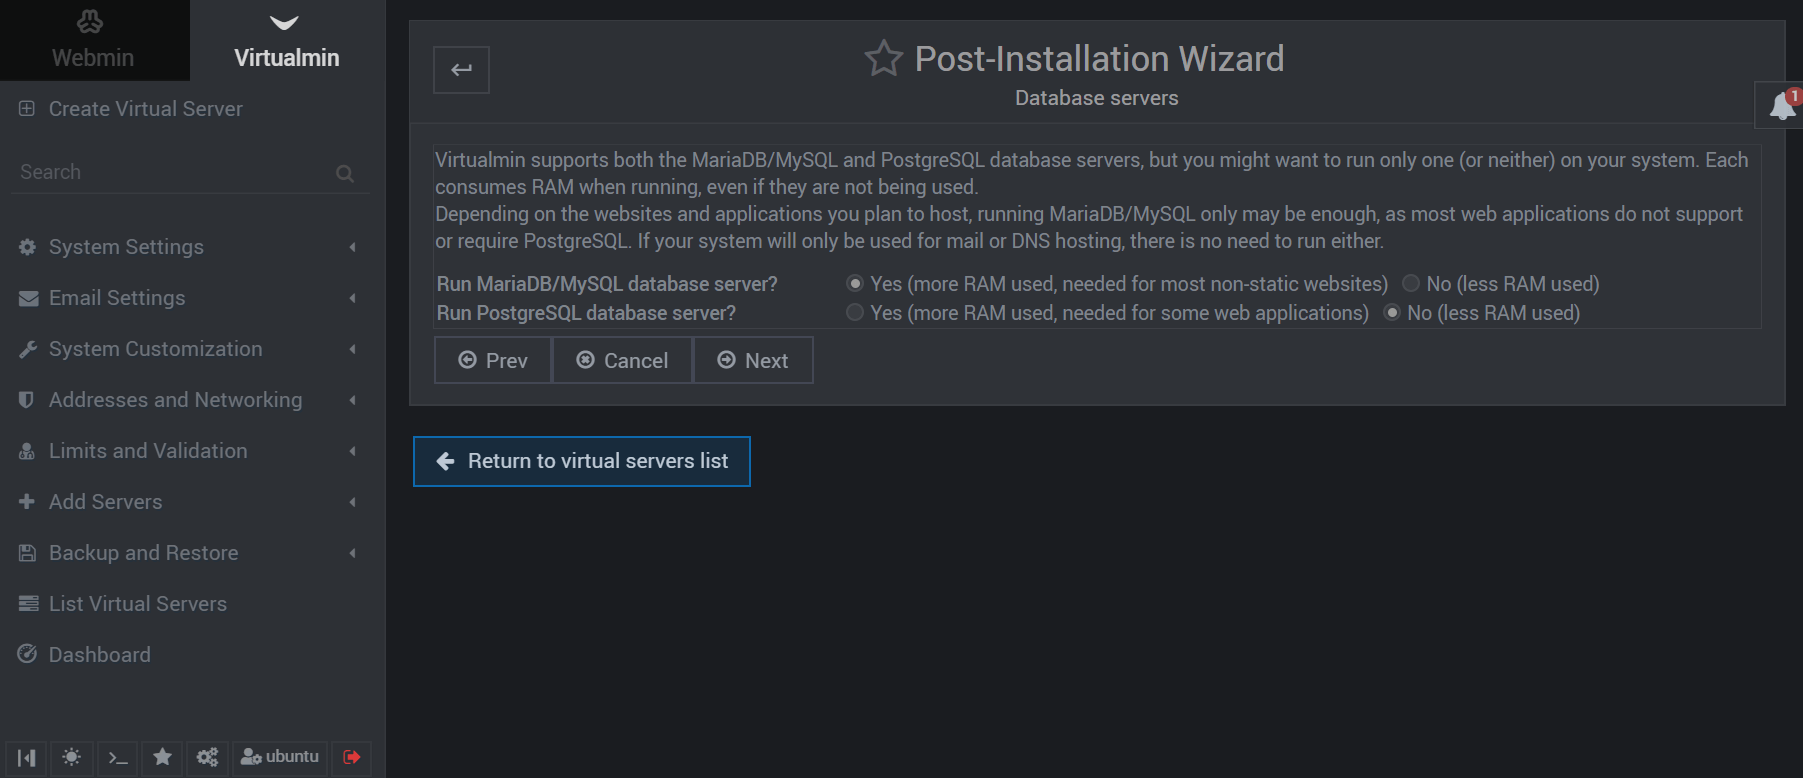
Database servers: leave default, yes for MariaDB/MySQL, no for PostreSQL.
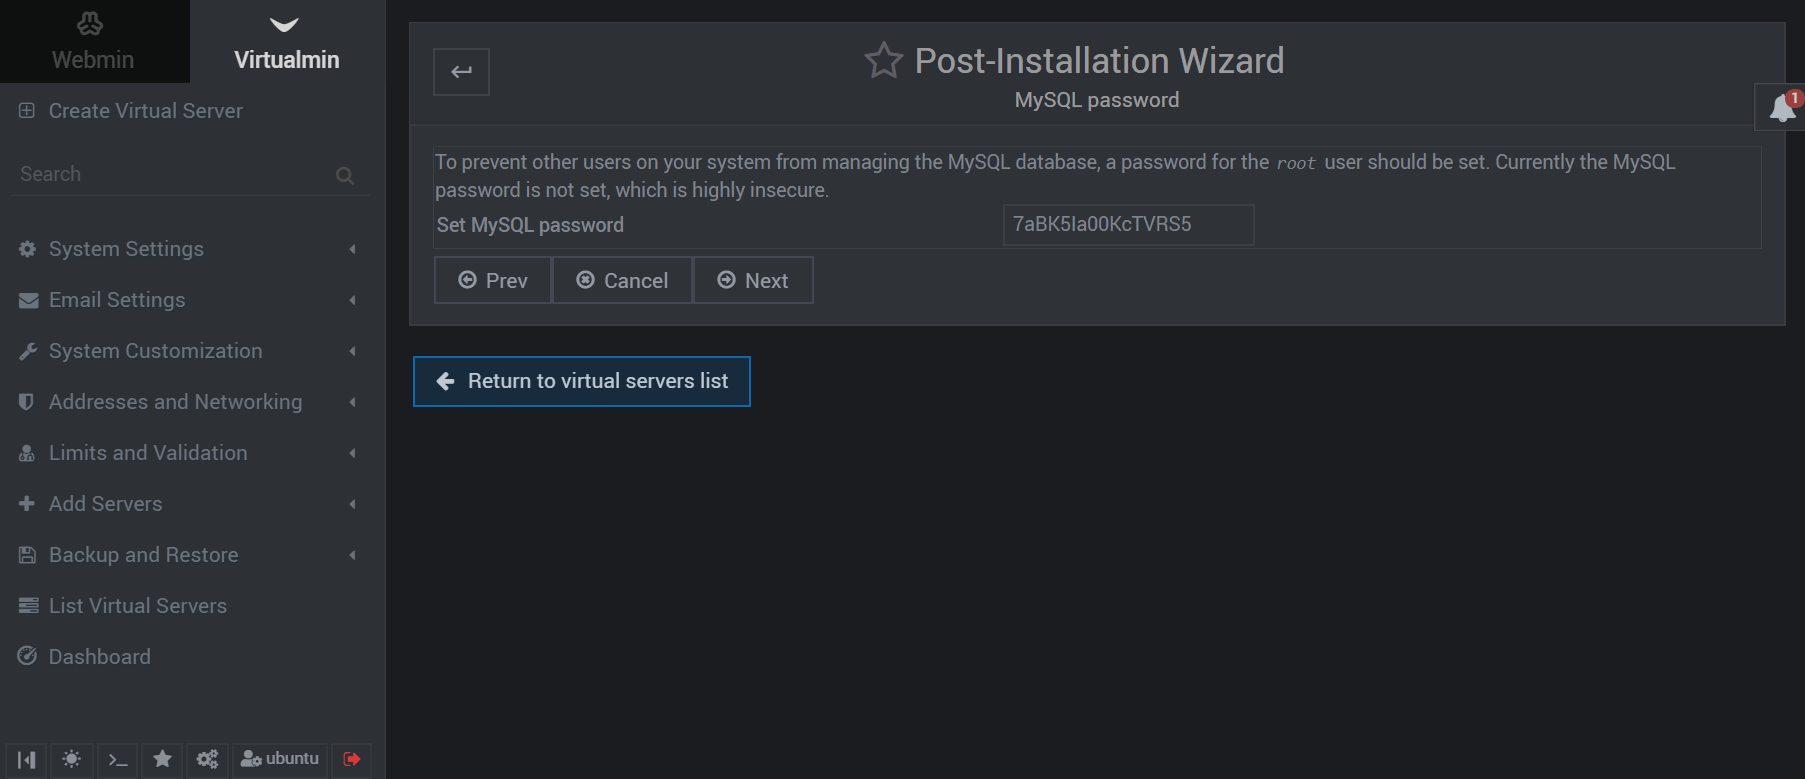
MySQL password: use the already generated one or type a new one.
MariaDB/MySQL database size: default, optimizing the database server is not the scope of this tutorial

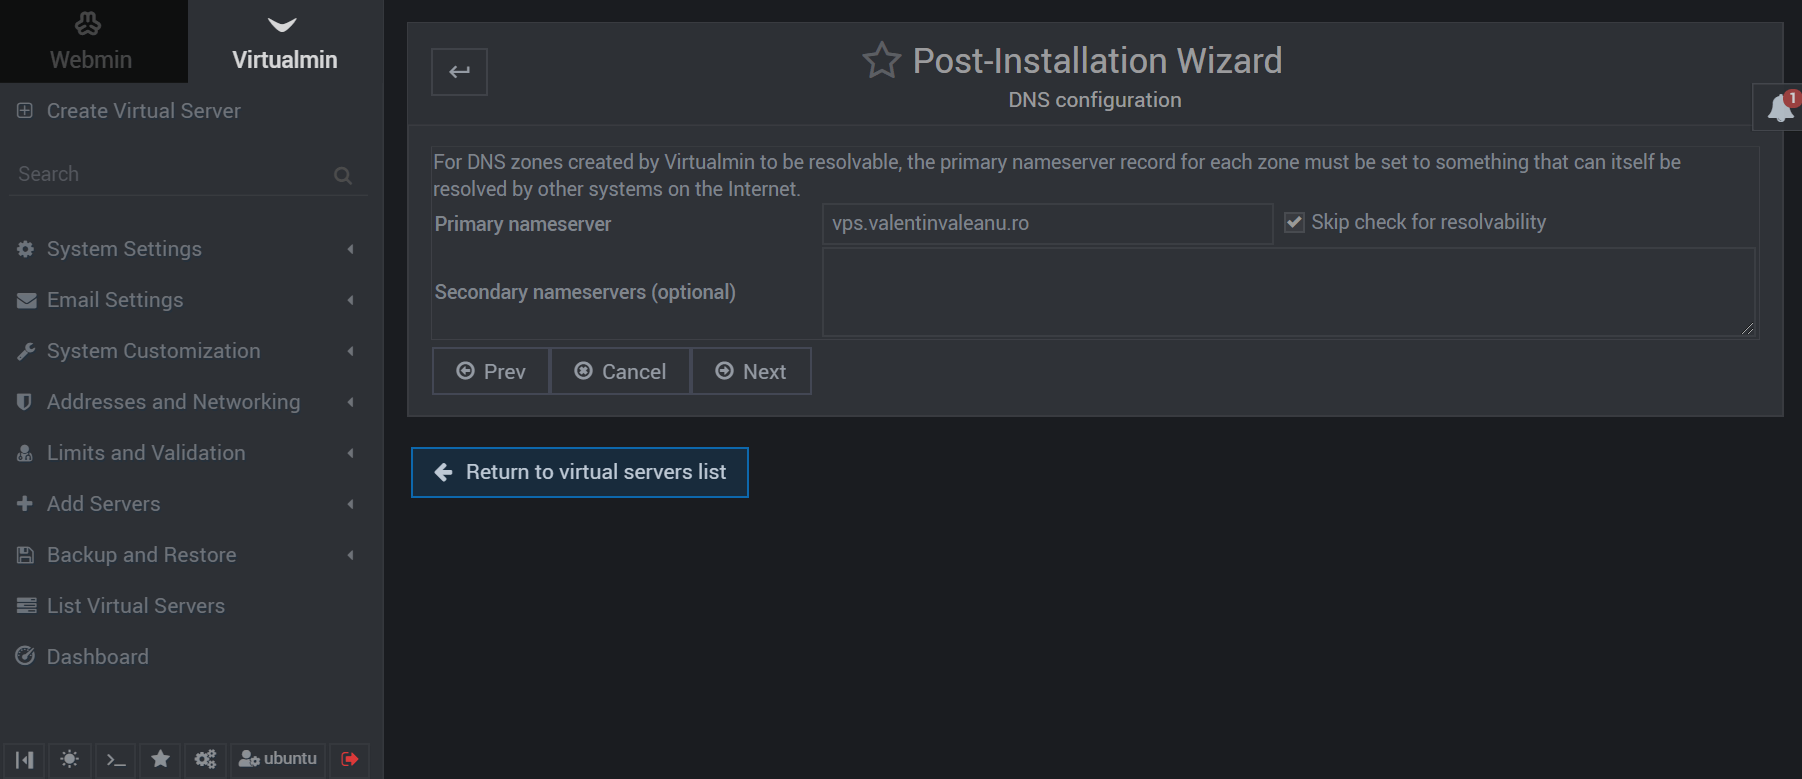
DNS configuration: you'll need to set the hostname for the primary DNS server used when you'll create a website on this server. Usually it is the same as the hostname so we'll use in this case vps.valentinvaleanu.ro. I'll check Skip check for resolvability because vps.valentinvaleanu.ro won't be available as this is a tutorial.
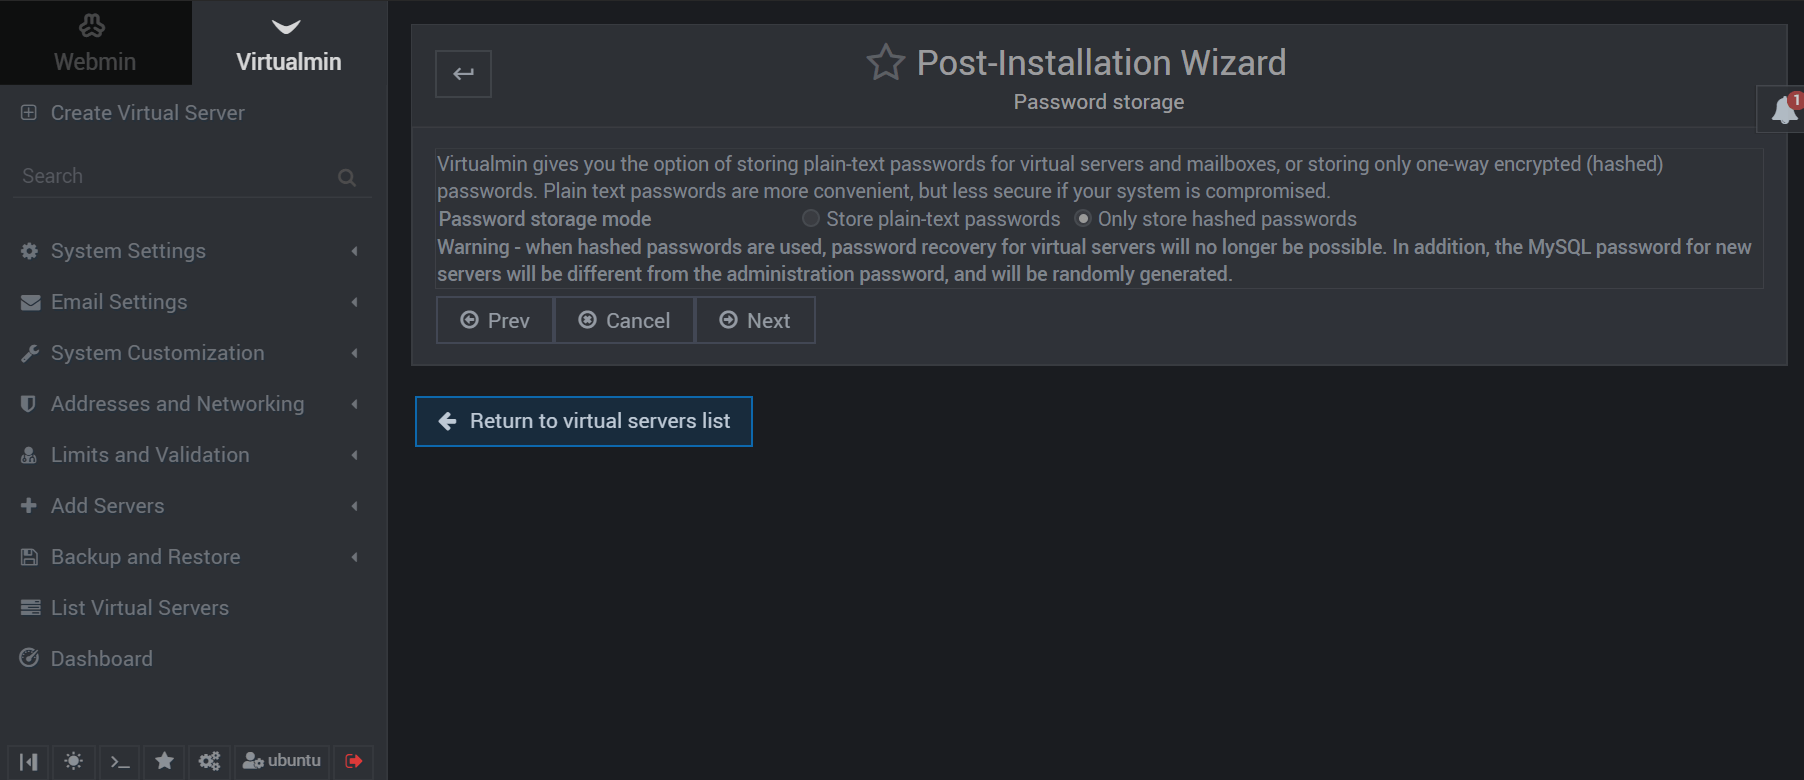
Password storage: go with hashed passwords for the better security in case the server is compromised. It adds a little overhead as the database password will be auto-generated and will be different than the one for the website account.
After this step and the final confirmation you'll see: Virtualmin's configuration has not been checked since it was last updated. Click the button below to verify it now.
Press Re-check and refresh configuration and if everything is ok, after a series of checks, the following message will be at the end: .. your system is ready for use by Virtualmin.
Go to Dashboard and install all the available updates, if any:
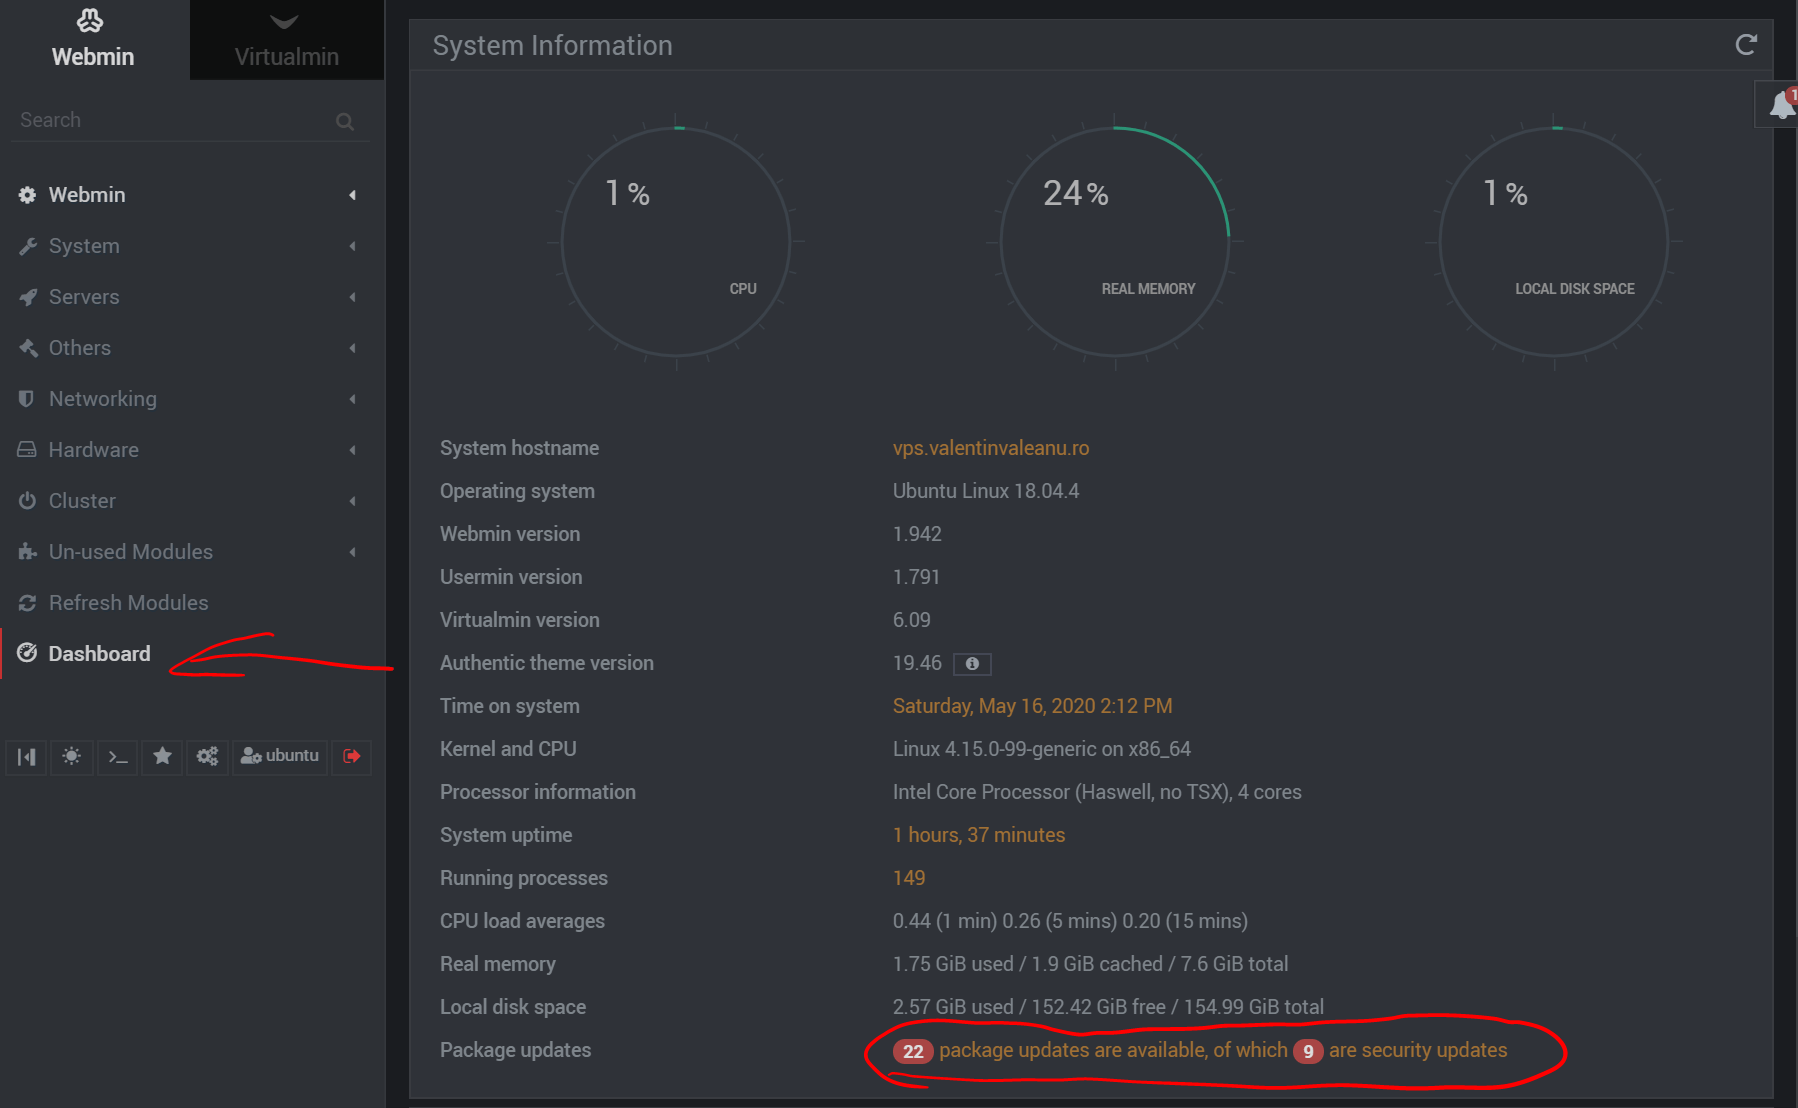
After the updates go and reboot the VPS: Webmin - System - Bootup and shutdown - (bottom of the page) Reboot system
Wait 20-30 seconds then check the Dashboard again.
This is how a finished Virtualmin setup should look. The next step will be to increase the security (firewall) and configure the services based on your needs.

